Search This Blog

Monday, October 31, 2011

Pumpkin Cheesecake!

 Pumpkin Cheesecake!!   


I had a request for a recipe today for Pumpkin Cheesecake.... so here it is. This is the recipe that I use every year around this time.  I love love love it.  I am a huge cheesecake fan!  I do use the water bath method when cooking this. I hope you enjoy and Happy Halloween!!!

Ingredients

Crust:

  • 1 3/4 cups graham cracker crumbs
  • 3 tablespoons light brown sugar
  • 1/2 teaspoon ground cinnamon
  • 1 stick melted salted butter

Filling:

  • 3 (8-ounce) packages cream cheese, at room temperature
  • 1 (15-ounce) can pureed pumpkin
  • 3 eggs plus 1 egg yolk
  • 1/4 cup sour cream
  • 1 1/2 cups sugar
  • 1/2 teaspoon ground cinnamon
  • 1/8 teaspoon fresh ground nutmeg
  • 1/8 teaspoon ground cloves
  • 2 tablespoon all-purpose flour
  • 1 teaspoon vanilla extract

Directions

Preheat oven to 350 degrees F.

For crust:
In medium bowl, combine crumbs, sugar and cinnamon. Add melted butter. Press down flat into a 9-inch springform pan. Set aside.

For filling:
Beat cream cheese until smooth. Add pumpkin puree, eggs, egg yolk, sour cream, sugar and the spices. Add flour and vanilla. Beat together until well combined.

Pour into crust. Spread out evenly and place oven for 1 hour. Remove from the oven and let sit for 15 minutes. Cover with plastic wrap and refrigerate for 4 hours.

Frito Chili Pie... need I say more....


Frito Chili Pie

Ingredients

  • 2 pounds Ground Chuck
  • 3 cloves Garlic, Minced (optional)
  • 1 can (12 To 14 Ounce) Tomato Sauce
  • 1 can (10 Ounce) Ro-tel (diced Tomatoes And Chilies)
  • ½ teaspoons Salt
  • 1 teaspoon Ground Oregano
  • 1 Tablespoon Ground Cumin
  • 2 Tablespoons Chili Powder (more To Taste)
  • 1 can (14-ounce) Kidney Beans, Drained And Rinsed
  • 1 can (14-ounce) Pinto Beans, Drained And Rinsed
  • ¼ cups Masa (corn Flour) Or Regular Corn Meal
  • ½ cups Warm Water
  • Individual Bags Of Fritos
  • Grated Sharp Cheddar Cheese
  • Diced Red Onion (Optional)

Preparation Instructions

Brown ground chuck with garlic in a pot over medium-high heat. Add tomato sauce, Rotel, salt, oregano, cumin, and chili powder. Cover and reduce heat to low. Simmer for 30 minutes.
Add drained and rinsed beans. Stir to combine, then cover and simmer for another 20 minutes.
Mix masa with water, then add to the chili. Stir to combine and simmer for a final 10 to 15 minutes. Set aside.
Serve by slicing the Frito bags open lengthwise. Pile in chili and cheese, and diced onion if using. Serve immediately with plastic forks. A crowd-pleaser!

Friday, October 28, 2011

Creamy Hash Brown Casserole!!

This is a recipe that is so simple and yummy.  I make this sometimes as a side dish for dinner and sometimes I put some sausage in it or bacon or smoky links and make it for breakfast.  I also use Ritz crackers finely crumbled on top too!  Enjoy! 


Creamy Hash Brown Casserole

Creamy Hash Brown Casserole

Ingredients

1/4 cup butter, plus more for dish
1 onion, chopped
1 (16-ounce) container sour cream
1 (10 1/2-ounce) can cream of celery soup
1 (8-ounce) package shredded Cheddar and Monterey Jack cheese blend
1/2 teaspoon garlic powder
1 (30-ounce) package frozen shredded hash brown potatoes, thawed
1 teaspoon salt
1/2 teaspoon ground black pepper
2 cups crushed potato chips

Directions

Preheat oven to 350 degrees F. Lightly butter a casserole dish.
In a small skillet, melt 1/4 cup of butter over medium heat. Add onion, and cook 3 to 4 minutes, or until soft. Pour mixture into a large bowl. Add the sour cream, cream of celery soup, cheese, garlic powder, hash browns, and salt and pepper. Combine until well blended.
Pour mixture into prepared baking dish. Top evenly with crushed potato chips and bake for 45 minutes, or until hot and bubbly.

Spider Bites

I seen this recipe today and tried it with my son this morning. These are so stinking cute and great for Halloween.  It was so easy to make and my son had a blast!  Enjoy!

Spider Bites

Recipe courtesy Sandra Lee, 2007


Ingredients

Directions

Place parchment paper on baking sheet; set aside.
In a large glass microwave-safe bowl combine chocolate chips and peanut butter. Melt on high for 2 to 3 minutes. Remove and stir until smooth.
Stir in pretzel sticks. With clean hands grab pretzel sticks and drop on prepared baking sheet in clusters to look like spiders.
Place in freezer for 5 minutes or until to chocolate is hardened. Remove and serve.

Thursday, October 27, 2011

Restaurant Rescue: Eat Out with Kids Without Losing Your Mind

One funny tip I have is ask for your to-go box and bill when you get your food just in case you need to make a quick dash out of there. Adam and I have to do that all the time, with a 8yr old, 3yr old and a 15 month old we are prepared to flee at anytime.  I also try to make sure they do not get out of their seat and if they do we are in for it because it is hard to get them back in it.  I do also try to take some toys in the diaper bag that I get at the dollar store for them to play with, you just have to make sure it is something they want to play with and are not bored with already.If you have any tips leave a comment to share, I would love to hear them!!


Restaurant Rescue: Eat Out with Kids Without Losing Your Mind

From our provider: SheKnows

Kids in Restaurants


You've come to the restaurant to enjoy a pleasant meal outside the confines of your own kitchen. But the experience is marred by the table of what you can only describe as wild animals recently escaped from a nearby zoo. The children grab food with their hands, leave their chairs repeatedly, bicker, spill, and, well, you can't even bear to watch anymore.

And these are your children!

We've all been there, stuck in a very public place, watching in horror as our kids go crazy for everyone to see -- and criticize. But you can actually have an enjoyable restaurant experience with your kids, if you do just a little advance planning.

Insist on good manners at home: You can't expect kids to differentiate between situations the way adults do. So if dinner is a free-for-all at home, that's what they'll expect -- and do -- when you eat out. Teach kids to sit at the table, use indoor voices, and follow other basic rules.

Of course, you also need to bear in mind that kids are not small adults -- they're kids. So they're not going to sit quietly through a seven-course banquet. Set reasonable expectations for mealtime behavior -- but be firm about those expectations.

Set yourself up for success: In general, this is a cornerstone of good parenting. Don't take your toddlers to the kind of restaurant where meals take hours and a dropped fork brings a glare from other patrons. Don't expect them to feel at home with ethnic food they've never experienced if they won't eat anything more exciting than PB&J at home.

Choose a family-friendly restaurant with a decent selection of kids' meals. And here's a tip learned from a mom of 10 children: Discuss choices with your kids before you leave the house and call in their orders. That way, when you walk in and sit down, their food will be ready in moments, and they can dig in. If you and your spouse can also pre-order, even better. You can have a restaurant experience and be out the door before the meltdowns begin.

Bring along a coloring book and some crayons to keep kids occupied at the table. Do not make the mistake of bringing a bagful of toys and games, though -- things will be thrown, lost, or soiled in moments.

Eat at off times: Don't walk into the dinner rush with your easily over-stimulated child. Aim for quieter times when you'll have a little more room and a little less pressure. A weekend brunch or a late lunch can be a better restaurant experience than an end-of-the day dinner when kids are bound to be tired and cranky.

Reward your server: If your pre-ordered meals are ready when you arrive and your server helps make your experience as pleasant as possible, thank him or her and tip generously. If, despite everyone's best efforts, your kids aren't cooperating, it's not the waiter's fault. Apologize sincerely, thank him or her, and tip generously.

Eating out with kids can be a great experience. You'll get better with practice, and before long you'll find yourself beaming when someone compliments you on your well-behaved children.

Chicken Nuggets with Honey Mustard Dipping Sauce

Ok ..... This is one of the most requested and loved things I make and take to family gatherings!  People eat them up. I ALWAYS double the recipe because people truly do LOVE them that much. I am postive that you will love them and so will everyone else! They are good to make for dinner too, kids love them and they are so much better for them than the process nuggets. Enjoy!!


Chicken Nuggets with Honey Mustard Dipping Sauce


Ingredients

1/3 cup butter
6 Chicken breast fillets, cut into 1 1/2-inch cubes
2 cups crushed sour-cream-and-onion-flavored potato chips
2 tablespoons milk
1 egg
Honey Mustard:
3/4 cup mayonnaise
3 tablespoons honey
2 tablespoons yellow mustard
1 tablespoon lemon juice or juice from 1/2 lemon
Horseradish, to taste
2 tablespoons orange juice (more or less as needed)

Directions

Preheat the oven to 350 degrees. Spread the crushed potato chips in a shallow dish. Beat together the egg and milk in a shallow bowl. Dip the chicken cubes into the egg mixture and then dredge them in the chips. Place the chicken nuggets on a baking sheet and drizzle with melted butter. Bake for 15 to 18 minutes, or until golden brown. The chicken nuggets can be frozen after baking. Serve with your favorite sauce, such as honey mustard or ranch dressing.

Wednesday, October 26, 2011

Yummy Pizza Casserole!!

This is a great recipe for the family. It is a quick recipe to make and if you are in a real hurry pick up a bag of the fully cooked sausage crumbles. My whole family loves this and I just normally make some breadsticks and a salad to go along side it. Enjoy!!


Pizza Casserole

·         3 Cups uncooked ziti noodles
·         1 lb. sausage
·         1 onion chopped
·         1 green pepper chopped
·         5 garlic cloves, minced
·         2 (15 oz) cans tomato sauce
·         1(14.5 oz) can diced tomatoes with basil, garlic, oregano
·         1 (3oz) pkg pepperoni
·         1 small can of mushrooms (optional)
·         1 tbsp dried parsley
·         1 tsp dried oregano
·         ½ tsp salt
·         ½ tsp ground black pepper
·         2 ½ cups shredded mozzarella cheese
     Cook pasta according to package direction, drain and set aside. Preheat oven to 350 degrees. Lightly grease a 9 X13 pan. In a large skillet, cook sausage, onion, green pepper over medium heat until sausage is browned and crumbly, the last minute or so of cooking add the garlic careful not to burn. Then drain the excess grease. Spoon sausage mixture into a large bowl, stir in tomato sauce, tomatoes, pepperoni, mushrooms, parsley, oregano, salt and pepper. Stir in one cup of the mozzarella cheese.  Add cooked pasta, tossing to combine. Spoon mixture into baking dish and top with remaining cheese. Bake for 30 -40 minutes until hot and bubbly.
 

Tuesday, October 25, 2011

Snowballs Recipe!!!! Great for the Holdiays!

Well here is a Delicious recipe for something called snowballs. It is basically cake and icing covered in chocolate... sounds good right! It is so simple and you can change the flavor of cake mix to your preference. I make these for the holidays and everyone loves them. I know you will too!
 
  • Bake one cake mix, your choice of flavor, as directed in a 9 x 13 pan.  ( I use Lemon most of the time)
  •  One can of cream cheese whipped frosting
  •  16 oz. almond bark
 
After cake has cooled, put into bowl and crumble it up.  Mix the can of frosting into the cake.  It is easier to use your hands to mix it up.  Shape into ping pong size balls.  Place on cookie sheet and place in refrigerator to get cold.  Melt bark in double boiler and dip cake balls into bark and place on sheet and let set until firm.


This is really easy to do.  Enjoy!!

Monday, October 24, 2011

Nutter Butter- Peanut Butter Pie

I am posting this recipe today because a fellow food blogger lost her husband unexpectedly at a young age, and Peanut Butter pie was his favorite. She is asking everyone to make a pie and share it with the ones you love.  So in honor of Jennie's husband Mikey here is a awesome recipe for Peanut Butter Pie. Tomorrow is not guaranteed.. cherish today!


http://www.recipegirl.com/2011/08/18/nutter-butter-peanut-butter-pie/

Nutter Butter- Peanut Butter Pie

Yield: 10 to 12 servings
Prep Time: 25 min
A no-bake pie to make and enjoy with your family. This pie is gluten-free adaptable- please see tips below the recipe.

Ingredients:

24 Nutter Butter cookies, crushed into crumbs
5 Tablespoons butter, melted
1 cup hot fudge
8 ounces cream cheese, at room temperature
3/4 cup powdered sugar, sifted
1 cup creamy peanut butter (not the natural kind)
1 Tablespoon vanilla extract
8 ounces Cool Whip, defrosted
additional hot fudge for drizzling, optional

Directions:

1. In a medium bowl, combine cookie crumbs and butter. Press the mixture into a pie plate. Drizzle the hot fudge on top and smooth it out. Place in the freezer while you're preparing the filling.
2. In a large bowl, use an electric mixer to mix cream cheese and powdered sugar. Mix in peanut butter and vanilla; beat until smooth. Beat in about 1 cup of the Cool Whip. Set the beaters aside and use a rubber spatula to fold in the rest of the Cool Whip. Keep folding until the mixture is well combined.
3. Spoon the peanut butter filling into the frozen pie crust, smooth the top, and place back into the freezer. Freeze for at least 3 hours, or until set enough to slice easily. Drizzle additional hot fudge on individual slices, if desired.

Tips:

*Why not natural peanut butter? It will not mix in well and make this the creamy pie that it's meant to be.
*If allergic to peanuts, try using Oreos for the crust and a creamy version of almond butter instead (like the Barney's brand)
*If preparing this recipe as GLUTEN-FREE, just use some gluten free cookies in place of the Nutter Butters (like GF Oreos), use GF hot fudge, GF peanut butter and GF whipped topping.

Sunday, October 23, 2011

Amazing Chocolate Derby Pie

Here is a great pie recipe for this time of year. I love it, there is something about the combination of the nuts and chocolate!! I love it and so does my husband... he asks for it all the time! Enjoy!!! 

Amazing Chocolate Derby Pie


3 large eggs                                       1 tsp vanilla

½ cup sugar                                         1tsp bourbon ( optional)

½ tsp salt                                             1 cup walnut pieces

¾ stick melted butter                          ¼ chocolate chips

1 cup dark corn syrup


Combine eggs, sugar, salt, butter, corn syrup, vanilla, and bourbon.  Mix thoroughly and fold in walnuts and chocolate chips.  Spoon filling into a 9 inch unbaked pie shell.  Bake in 350 degree oven.  Crust should get golden brown and the center of the pie should be well set when shaken.  Pie will rise a little in the center when it is done.

Spirit Jugs

These are too cute!! I had to share, they are so easy and simple. A great Halloween family activity.


Spirit Jugs


    Milk Jug Ghost Halloween Decoration

    Stationed on a walkway or porch, these homemade lanterns will extend a ghostly greeting and good-bye to all your holiday visitors.


    Materials
    • Clean plastic gallon milk jugs
    • Black permanent marker
    • Craft knife
    • String of 50 clear low-wattage holiday lights


    Total Time Needed: 1 Hour

    Instructions
    1. Draw ghost eyes and mouths on the jugs. Tip: Leave the caps on while you do this, so the jugs don't dent.

    2. Use the craft knife to cut a half-dollar-size hole in the back of each jug (a parent's job).
    3. Arrange the ghosts near each other and string the lights between them, stuffing several bulbs into each of the jugs.

    Friday, October 21, 2011

    "Boo Bag"!

    I think these are so cute... If you have to take treat bags to your kids school or just something special to put candy and treats in for those special kids like nieces and nephews that come to your house.  This is very inexpensive and easy.. that's what I like!! I am going to make these for niece and nephew just to make it extra special for them... What a great idea!!!!
     I don't want to insult your intelligence by writing a tutorial. However....here goes. Cut the top of a white bag into a rounded shape. Glue on googly eyes. Now you have a "Boo Bag"!

    Family Sized Baked Burrito!!

    Here is another one of my family’s favorites… We had this for supper last night and everyone ate it and loved it as usual.  I have a 1 ½ year old and he ate it up (I love it when they are at that age where they eat anything). You can use red or green salsa and both taste great. I actually do not put the tomatoes on top but it is good either way. Enjoy!!

    Family Sized Baked Burrito:

    Ingredients:

    • 1 plum tomato, thinly sliced
    • 3 c diced cooked chicken
    • 1/2 c chopped onion
    • 1/2 lime
    • 3/4 c thick and chunky salsa
    • 1 tbs southwestern seasoning mix* or taco seasoning
    • 4 garlic cloves, pressed
    • 2 cups shredded Mexican blend cheese, divided
    • 4 burrito-size flour tortillas (11-11 1/2 in)**
    • 1 can (9 oz) bean dip*** .
    • Assorted toppings such as shredded lettuce sliced pitted ripe olives, snipped fresh cilantro…

    1. Preheat oven to 425º. Thinly slice tomato, set aside. Dice chicken. Chop onion. Juice lime half into bowl (juice the other half, too – put it in a baggy and freeze for next time.) Add chicken, onion, salsa, seasoning mix, and pressed garlic. Microwave chicken mixture 3-4 minutes or until hot, stirring occasionally. Stir in 1 1/2 cups of the cheese (NOT ALL OF IT) save the other ½ cup for on top of the burrito once it is folded.
    2. Arrange tortillas in an overlapping circular pattern on a large pizza stone (or cookie sheet), covering entire surface of the stone. (Tortillas will extend off edge of baking stone by 5 inches). Starting at center, spread bean dip over tortillas, forming a 10×10 inch square. Spoon chicken mixture evenly over bean dip. Fold edges of tortillas up over chicken mixture in an envelope pattern. It will make a square.
    3. Arrange 16 tomato slices in rows over top of burrito. Sprinkle remaining cheese over burrito, covering it completely. Bake 18-20 minutes or until cheese is melted and edges are browned. Cut into rectangles, serve with assorted toppings


    Thursday, October 20, 2011

    Missy’s Marinated Tomatoes


    If you have any tomatoes left in your garden this is a way to use those up.  This recipe is one of the most popular I have ever made.  This recipe makes a juice for the tomatoes and it is so good I have known more than one person to drink it... If that tells you how good it is.  I know you will enjoy this!

    Missy’s Marinated Tomatoes

    Ingredients

    • 1 cup Canola Oil
    • ¼ cups Balsamic Vinegar
    • 4 Tablespoons Sugar
    • 1 teaspoon Salt
    • Freshly Ground Black Pepper
    • 3 whole Green Onions, Sliced
    • ¼ cups Chopped Parsley
    • 18 whole Basil Leaves (chiffonade)
    • ¼ teaspoons Ground Thyme
    • 2 cloves Garlic, Minced Finely
    • 2 pounds Tomatoes, Cut Into Quarters (if Big) Or Halves (if Small)
    • 1 whole Baguette, Sliced
    • 1 clove Garlic, Peeled

    Preparation Instructions

    Combine all ingredients except tomatoes in a large glass bowl. Whisk to combine, then add tomatoes. (You can up the quantity of tomatoes if need be.) Use regular red tomatoes, or a mixture of red, yellow, heirloom, etc. Use different sizes of tomatoes, too–pretty!
    Allow to marinate for at least 3 to 4 hours, several hours if possible. Tomatoes will give off liquid as they marinate.
    Use leftover tomatoes to make bruschetta: slice baguette and brush slices with olive oil. Grill on a skillet or grill pan until golden. Rub slices with garlic cloves. Top with tomatoes, allowing juice to drip on the bread.

    Wednesday, October 19, 2011

    Edible Playdough!!!

    I make this a couple times per month for the kids to play with. They absolutely love it!  It is something different and fun for them.  I give them a couple cookie cutters and forks or butter knifes and let them go crazy. It is extremely easy to make!
    Peanut Butter Playdough
    1 C creamy peanut butter
    2 C powdered sugar
    1/2 C honey
    Directions: Mix. I use my stand mixer to make it quick, clean and easy. You can let your kids mix it up by hand but it gets a little messy and takes longer.
    A lot of edible playdough recipes you’ll find include dry milk powder, but It is a little to grainy for me and I think using the powdered sugar taste better.

    Double Decker Pumpkin- Caramel Pie

    I came across this recipe and thought it sounded very good. I thought I would share it with you.  Let me know what you think... I think anything that wins a contest is probably Delicious!


    Double Decker Pumpkin- Caramel Pie

    Yield: One 9-inch pie
    Prep Time: 35 min + chill time
    Cook Time: 45 min
    This pie took first place in a local Fall Harvest Festival pie contest!

    Ingredients:

    25 Oreos (creme included), crushed into crumbs (about 2 cups)
    6 tablespoons unsalted butter, melted
    3 large eggs
    2 3/4 cups heavy cream, divided
    One 15-ounce can unsweetened pumpkin puree
    1/2 cup light brown sugar
    1 teaspoon pumpkin pie spice
    1/2 teaspoon salt
    28 caramels, unwrapped
    1 ounce bittersweet chocolate, for grating

    Directions:

    1. Preheat oven to 350 degrees F. In a small bowl, stir the Oreo crumbs and butter until combined. Press the mixture onto the bottom and up the sides of a 9-inch deep-dish pie pan; freeze until set (15 minutes). Bake for 10 minutes; let cool.
    2. Meanwhile in a large bowl, whisk together the 3 eggs, 1 cup cream, pumpkin, brown sugar, spice and salt until just combined. Pour into the cooled pie shell and bake until set, 40 to 45 minutes. When you shake the pan, the filling should no longer be jiggly. Let the pie cool at room temperature slightly, then refrigerate for at least 3 hours, or overnight.
    3. In a bowl, microwave the caramels with 1/2 cup cream until melted, 2 to 3 minutes- adding 1 minute increments, if needed, if they are still not completely melted. Stir until smooth, then let cool to room temperature.
    4. Using an electric mixer, whip the remaining 1 1/4 cups cream until soft peaks form. Drizzle in the cooled caramel and beat until well blended. Spoon the caramel whipped cream on top of the pumpkin filling and refrigerate until completely chilled. Before serving, coarsely grate the chocolate on top of the pie

    Tips:

    *If you don't have access to Oreo's, you can use another type of chocolate sandwich cookie. I used the Oreos with the chocolate filling, but you can use the regular ones if you'd like.
    *If your pie cracks on the surface while baking, don't worry about it- you'll be covering that up with the caramel whipped cream!
    *Don't have any pumpkin pie spice? Make your own by mixing equal parts of cinnamon, ginger, allspice and nutmeg.
    *Stick toothpicks in the top of any leftover pie before you cover with plastic wrap (keep stored in the refrigerator).
    Source: RecipeGirl.com (adapted from Everyday with Rachael Ray)

    Tuesday, October 18, 2011

    Restaurant Style Salsa..yumm...

    I made this this morning and it is wonderful!!  It is very close to another recipe I make and just as good.  I love fresh salsa, it makes all the difference being fresh!! Enjoy

    http://thepioneerwoman.com/cooking/2010/01/restaurant-style-salsa/


    Restaurant Style Salsa

    Ingredients

    •1 can (28 Ounce) Whole Tomatoes With Juice

    •2 cans (10 Ounce) Rotel (diced Tomatoes And Green Chilies)

    •1/4 cup Chopped Onion

    •1 clove Garlic, Minced

    •1 whole Jalapeno, Quartered And Sliced Thin

    •1/4 teaspoon Sugar

    •1/4 teaspoon Salt

    •1/4 teaspoon Ground Cumin

    •1/2 cup Cilantro (more To Taste!)

    •1/2 whole Lime Juice

    Preparation Instructions

    Note: this is a very large batch. Recommend using a 12-cup food processor, or you can process the ingredients in batches and then mix everything together in a large mixing bowl.

    Combine whole tomatoes, Rotel, onion, jalapeno, garlic, sugar, salt, cumin, lime juice, and cilantro in a blender or food processor. Pulse until you get the salsa to the consistency you'd like---I do about 10 to 15 pulses. Test seasonings with a tortilla chip and adjust as needed.Refrigerate salsa for at least an hour. Serve with tortilla chips or cheese nachos.


    Cagey Ghosts for Halloween!!!

    I think this is very cute.  I am going to try to make these and put them in my yard with my husband's help.  I think my kids will love to do this too. It will be a fun Halloween project! 
     
    Cagey Ghosts
    Tomato cages come to life with this devilishly easy craft
    by Amy Kaldor-Bull From FamilyFun Magazine
    • Rated by 119 members
    Cagey Ghosts

    Out-of-use tomato cages are a restless bunch. Come Halloween, they haunt front porches as glowing ghosts.


    Materials
    • Tomato cage
    • Duct tape
    • String lights
    • Twist ties
    • Socks
    • Sticks
    • Marker or craft foam (for facial features)
    • White twin sheet
    Total Time Needed: 1-2 Hours
    Instructions
    1. Cagey Ghosts - Step 1 To make one, set up the cage as shown. To form the head, use duct tape to secure the rounded prongs of the cage. Thread the lights through the cage, and secure them with twist ties.
    2. For each arm, ball up two socks and duct-tape them to a stick, placed in the ground.
    3. Add marker or pinned-on craft foam facial features to a white twin sheet, then drape it over the structure.

    Homemade Crockpot Apple Butter

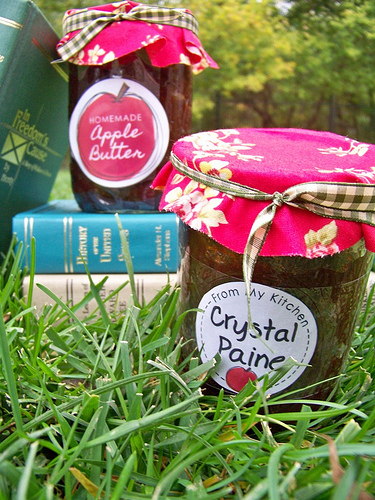
    I have made this and it is very good and easy!  The bonus to this is it makes your house smell soooo good! I think I might put some of this in jars and give it away. I love the labels it makes it look very cute!!

    Homemade Crockpot Apple Butter

    • 6 pounds medium apples (I used Jonathans, but any variety or mixture of varieties should work.)
    • 2 Tablespoons vanilla extract
    • 1 1/2 cups raw or brown sugar
    • 1 teaspoon ground cloves
    • 3-4 teaspoons cinnamon
    Peel, core, and slice apples in fourths. Put them in the crockpot with the vanilla and cook on low for 6-8 hours. Stir every few hours. Once apples are very, very tender, mash with a potato masher and stir in sugar and spices. Cook on low for another 5-6 hours, stirring occasionally.
    Cool and pour into jars or an airtight container. Store in the refrigerator.

    Sunday, October 16, 2011

    Creamy BLT Pasta!

         Well tonight we had BLT Pasta for supper.  It is one of our all time favorites!  We make it all the time and the kids even love it.  I pair it with bread sticks and everyone cleans their plate. I hope you enjoy!!

    Pampered Chef's One Pot Creamy BLT Pasta


    Ingredients

      • 12 slices bacon, divided
      • 4 cups chicken broth
      • 2 (14 1/2 ounce) cans diced tomatoes
      • 1 medium onions, chopped
      • 4 cloves garlic, chopped
      • 1/2 teaspoon crushed red pepper flakes
      • 12 ounces uncooked linguine pasta
      • 1/4 teaspoon salt
      • 1 cup loosely packed fresh parsley, chopped
      • 4 ounces cream cheese, cubed
      • 1 ounce parmesan cheese, grated
      • halved grape tomatoes, a small handful

    Directions

    1.     Slice the bacon cross wise into strips. Cook in a large skillet with high sides for 8-9 minutes or until crisp. Remove bacon and drain on paper towels. Drain skillet, leaving 1 tablespoon of bacon drippings in the skillet.

    2.     Place broth and diced tomatoes in a large bowl. Microwave, covered, on high for 6-8 minutes or until hot. Return skillet to heat and add onion and red pepper flakes. Saute for 2-3 minutes or until tender. Add garlic and cook for 10-20 seconds. Add broth mixture, pasta, salt and half of the cooked bacon. Simmer covered for 9-10 minutes or until pasta is almost cooked by still firm. Stir occasionally.

    3.     Remove skillet from heat and add cubed cream cheese, grape tomatoes and parsley, reserving 1 tbsp of parsley for garnish. Cover and let stand for 5 minutes or until pasta is tender and sauce is thickened. Serve with remaining bacon, grated Parmesan cheese and reserved parsley.


    Wednesday, October 12, 2011

    Truffle Pie

    I am going to make this this weekend, the picture looks so good. And as we all know anything from the Deen family is to die for....right!!!!


    Truffle Pie

    Recipe from the Deen Brothers
    The layers of chocolate in this pie are mind-boggling. We make it for dessert whenever we have chocoholics over. Remember to start making this the day before so the pie can firm up in the fridge.
    Ingredients:
    TRUFFLE FILLING:
    2⁄3 cup heavy cream
    6 ounces bittersweet chocolate chips
    1 9-inch prepared graham cracker crust

    WHIPPED CHOCOLATE FILLING:
    6 ounces bittersweet chocolate chips
    1 1⁄2 cups heavy cream
    1⁄2 teaspoon vanilla

    WHIPPED CREAM TOPPING:
    1 cup heavy cream
    1⁄4 cup confectioners’ (powdered) sugar

    GARNISH:
    1 1⁄2 ounces milk chocolate
    1 1⁄2 ounces white chocolate
    1 1⁄2 ounces semisweet or dark chocolate
    Instructions:
    For the truffle filling, in a saucepan, bring 2⁄3 cup cream to a simmer. Place the 6 ounces chocolate chips in a bowl and pour the hot cream over the chocolate. Let stand for 1 minute, then gently whisk until smooth. Spread truffle filling over the bottom of the prepared pie crust. Freeze for 20 minutes.

    Meanwhile, for the whipped chocolate filling, in a double boiler or a microwave set on low power, heat the 6 ounces chocolate chips with 1⁄2 cup of the cream until the chocolate is just melted, stirring often. Let cool to room temperature. In a chilled bowl, beat the remaining 1 cup cream until thick. Add the chocolate mixture and the vanilla and beat until soft peaks form (tips curl). Spread the whipped chocolate mixture over the truffle filing in the crust. Refrigerate overnight.

    Just before serving, for the topping, beat 1 cup cream on medium speed of an electric mixer until it begins to thicken. Add confectioners’ sugar and whip until stiff peaks form (tips stand straight). Spread the whipped cream over the top of the pie. Using a grater or vegetable peeler, make pieces or shavings of milk chocolate, white chocolate, and semisweet or dark chocolate. Garnish pie with chocolate pieces. Serve immediately.
    Servings: 8
    Prep Time:
    Cook Time:
    Difficulty: Easy

    Peanut Butter Cookie Dough Brownies! Oh my....

    I have to say I made these today and they are sooo good. I am not a big chocolate eater, as a matter of fact I never eat chocolate but I could not resist these... This is similar to another brownie cookie dough bar I make and just as wonderful!! If you wanted a speedier way to make these you could use a box brownie mix and it turns out just as yummy!  Enjoy! If you get a chance check out some of her other recipes, she has a great food blog!

    Peanut Butter Cookie Dough Brownies


    Yield: 16 brownies
    Prep Time: 30 min
    Cook Time: 30 min
    Another one for cookie dough lovers only!

    Ingredients:

    BROWNIE LAYER:
    1/2 cup unsalted butter
    2 ounces unsweetened chocolate
    1 teaspoon vanilla extract
    1 cup granulated white sugar
    2 large eggs
    1/2 cup + 2 tablespoons all-purpose flour
    1/2 teaspoon baking powder
    1/2 teaspoon salt
    3/4 cup bittersweet chocolate chips
    COOKIE DOUGH LAYER:
    1/4 cup unsalted butter, at room temperature
    1/2 cup packed light brown sugar
    2 tablespoons milk
    1/2 cup creamy peanut butter
    1/2 cup + 2 tablespoons all-purpose flour
    1/2 teaspoon salt
    GANACHE TOPPING:
    3/4 cup bittersweet chocolate chips
    1/4 cup heavy whipping cream
    1 tablespoon granulated white sugar
    1 cup peanut butter chips

    Directions:

    1. Preheat oven to 350 degrees F. Spray an 8x8-inch pan with nonstick spray. Line the bottom of the pan with a strip of parchment paper, so that it comes up two of the sides that are opposite each other. Spray the parchment with nonstick spray too.
    2. Prepare the brownies: In a small bowl, melt the butter and unsweetened chocolate in the microwave until the butter is melted, about 2 minutes. Stir briskly until well-combined, then stir in the vanilla. Meanwhile, in a large bowl- use an electric mixer to beat together the sugar and eggs. Scrape in the partially cooled chocolate mixture and mix to combine. In separate medium bowl, whisk together flour, baking powder and salt. Stir the flour ingredients and chocolate chips into the wet ingredients. Spread the batter into the prepared pan. Bake 22 to 28 minutes, or until a toothpick inserted into the center of the brownies comes out clean. Remove from the oven and let cool.
    3. Prepare cookie dough layer: In a large bowl, use an electric mixer to combine butter and brown sugar. Mix until creamy. Add milk and peanut butter and mix to combine. Stir in flour and salt. Spread the peanut butter cookie dough in an even layer over the cooled brownies.
    4. Prepare ganache: In a small bowl, microwave chocolate chips cream and sugar for 1 minute, stirring after 30 seconds. Continue to microwave in 30 second bursts, stirring after each heating time. Continue heating and stirring until the chocolate is melted and the mixture is smooth. Drizzle the ganache over the peanut butter cookie dough layer and carefully spread to cover the top. Sprinkle with peanut butter chips. Refrigerate until the dough and the ganache topping are set (at least 1 hour). Use a knife to loosen the sides, then carefully grab the parchment paper and remove the whole pan of brownies to a cutting board. Use a sharp knife to cut them into squares. Keep refrigerated until ready to serve.

    Tuesday, October 11, 2011

    Pumpkin Chocolate Chip Muffins!

    These are some of the best muffins I have ever eaten…. I am not kidding you when I tell you they are so good.  My kids love them and my husband says they are the BEST muffins he has ever had.  I made a double batch of these this morning. If I have some left I am going to try to freeze them.  Try them and you will love them. Enjoy! http://moneysavingmom.com/2009/06/baking-day-pumpkin-chocolate-chip-muffins.html
    Pumpkin Chocolate Chip Muffins

    • 4 eggs
    • 2 cups sugar
    • 1 (16 oz.) can pureed pumpkin
    • 1 1/2 cups oil
    • 3 cups flour
    • 2 teaspoons baking soda
    • 2 teaspoons baking powder
    • 1 teaspoon ground cinnamon
    • 1 teaspoon salt
    • 1 package chocolate chips

    In a large mixing bowl, beat eggs, sugar, pumpkin, and oil until smooth. Add in dry ingredients and mix well. Fold in chocolate chips. Fill greased or paper-lined muffin cups 3/4 full. Bake 16-20 minutes at 400 degrees.

    Makes 24-30 muffins.

    Sunday, October 9, 2011

    Philly Cheesesteaks!

    Hello everyone, I am going to be honest I have been a little under the weather today so we had Subway for supper tonight.  I am planning my dinner for tomorrow night. While I was sick on the couch this afternoon my husband let me watch TV for a few minutes in between all the football games he was watching and I watched Sandra Lee’s Money Saving Meals and she made these Philly Cheesesteaks.  They looked so good I am making them tomorrow!  I think I am going to use cheese wiz like the original instead of making my own sauce….although I may try it.  I will post how they were tomorrow… If anyone else makes them let me know!!! Enjoy!


    Philly Cheesesteaks!
    Recipe copyright Sandra Lee, 2011

    Ingredients

    • 1 pound top round London broil
    • 3 tablespoons canola oil
    • 2 medium onions, sliced
    • 2 green peppers, cut into strips
    • Kosher salt and freshly ground black pepper
    • 1 tablespoon all-purpose flour
    • 1 cup milk, warm
    • 1 cup shredded provolone
    • 1/4 teaspoon cayenne pepper
    • Four 5-inch sub rolls, split

    Directions

    Wrap the meat tightly in plastic wrap and put it into the freezer for 45 minutes. It should be firm but not completely frozen.

    Heat a large cast-iron skillet or a griddle over medium-high heat. Add 1 tablespoon of oil. Add the onions and peppers and season with salt and pepper. Cook until they are soft and lightly browned, 8 to 10 minutes. Reserve 1/2 cup cooked onions and peppers for another use.

    In a medium pot over medium heat, add 1 tablespoon oil. Stir in the flour and cook for 1 to 2 minutes. Whisk in the milk and cook until it just starts to bubble and thicken, 4 to 5 minutes. Turn off the heat and whisk in the cheese and cayenne. Stir occasionally as the cheese melts. Cover and keep warm.

    With a sharp knife, slice the meat into very thin strips. In a large skillet over medium-high heat, add the remaining tablespoon of oil and cook the meat until it is done to your liking, 1 to 3 minutes per side. Divide the onion and pepper mixture among the 4 rolls. Top with the meat and the cheese sauce.