Search This Blog

Thursday, April 19, 2012

Strawberry Shortcake Cake! So amazing!!

I made this last week and thought….. This is heaven!  Don’t get me wrong I like strawberries but I like the juice more than I like the berry.  But this is so good I ate it all. The frosting is so amazing and the cake…. I tell ya this is soooo good! I hope you try it ASAP.  Enjoy!
Ingredients
  • Cake
  • 1-½ cup Flour
  • 3 Tablespoons Cornstarch
  • ½ teaspoons Salt
  • 1 teaspoon Baking Soda
  • 9 Tablespoons Unsalted Butter, Softened
  • 1-½ cup Sugar
  • 3 whole Large Eggs
  • ½ cups Sour Cream, Room Temperature
  • 1 teaspoon Vanilla
  • _____
  • Icing
  • ½ pounds Cream Cheese, Room Temperature
  • 2 sticks Unsalted Butter
  • 1-½ pound Powdered Sugar, Sifted
  • 1 teaspoon Vanilla
  • 1 pound Strawberries
Preparation Instructions
IMPORTANT: Be sure to use a cake pan that’s at least 2 inches deep! Before baking, the batter should not fill the pan more than halfway.
Sift together flour, salt, baking soda, and corn starch.
Cream 9 tablespoons butter with the sugar until light and fluffy. Add eggs one at a time, mixing well each time. Add sour cream and vanilla and mix until combined. Add sifted dry ingredients and mix on low speed until just barely combined.
Pour into greased and floured 8-inch cake pan. Bake at 350 degrees for 45 to 50 minutes, or until no longer jiggly like my bottom. Remove from cake pan as soon as you pull it out of the oven, and place on a cooling rack and allow it to cool completely.
Stem strawberries and slice them in half from bottom to top. Place into a bowl and sprinkle with 3 tablespoons sugar. Stir together and let sit for 30 minutes. After 30 minutes, mash the strawberries in two batches. Sprinkle each half with 1 tablespoons sugar and allow to sit for another 30 minutes.
Make icing: combine cream cheese, 2 sticks butter, sifted powdered sugar, vanilla, and dash of salt in a mixing bowl. Mix until very light and fluffy.
Slice cake in half through the middle. Spread strawberries evenly over each half (cut side up), pouring on all the juices. Place cake halves into the freezer for five minutes, just to make icing easier.
Remove from freezer. Use a little less than 1/3 of the icing to spread over the top of the strawberries on the bottom layer. Place the second layer on top. Add half of the remaining icing to the top spreading evenly, then spread the remaining 1/3 cup around the sides.
Leave plain OR garnish with strawberry halves.
IMPORTANT: Cake is best when served slightly cool. The butter content in the icing will cause it to soften at room temperature. For best results, store in the fridge!

Thursday, March 29, 2012

Glow in the Dark Easter Egg Hunt!!!

I found this on a fellow blogger's site and I love this idea.  I think with the warm weather we have been having it would be so fun to do with the kids.  My kids love to think they are staying up late and they would love to stay up and do this.  I think you can get the glow sticks at the dollar store so it should be fairly inexpensive.  What a cool new way to do a hunt! Please go to her blog and read all about his.  I will post a few pictures too. Happy Easter!


http://raisinglittledisciples.blogspot.com/2012/03/glowing-easter-egg-hunt.html


Homemade Flour Tortillas!!! So Good....

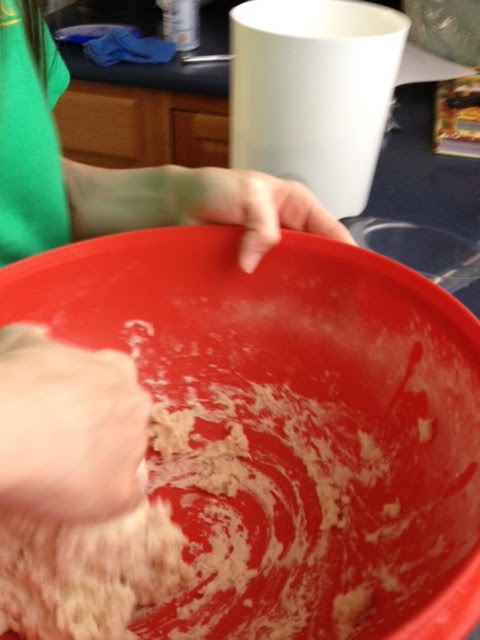
Yesterday I was out of tortillas and my husband wanted wraps for lunch, and since he was going on three hours sleep and going to work hard I decided I was going to make some tortillas so he can have some wraps before he goes and works hard for our family... I know I am a great wife right?  Anyways, I made these in about 5 minutes minus the time you have to let the dough rest.  My 3 year old even helped me.  When I ate these.... oh I tell ya they are so good and like no other.  They made everything taste so much better.  We had them for lunch and dinner they were that good.  They are actually very easy and a lot less expensive.  I will defiantly be making these again.  You should try these just once to see the difference.  Enjoy!! We did!


http://tastykitchen.com/recipes/homemade-ingredients/homemade-flour-tortillas/?print=1/#size3x5

Ingredients
  • 2-½ cups All-purpose Flour
  • 2-½ teaspoons Baking Powder
  • 1 teaspoon Kosher Salt
  • ½ cups Lard Or Vegetable Shortening
  • 2 Tablespoons (additional) Lard Or Vegetable Shortening
  • 1 cup Hot Water
Preparation Instructions
Combine flour, baking powder and salt in a large wooden bowl. Stir together.
Add spoonfuls of lard or shortening (use 1/2 cup PLUS 2 tablespoons), then use a pastry cutter to combine the ingredients. Cut mixture until it resembles coarse crumbs.
Slowly pour in hot water, stirring to bring mixture together. Lightly knead dough 30 to 40 times, or until it becomes a cohesive ball of dough and is less sticky. Cover with a tea towel and allow dough to rest for at least an hour.
Roll into ping pong size balls, place on a tray, cover with a tea towel, and allow to rest for another 20 to 30 minutes.
When you’re ready to make the tortillas, head a dark or cast iron griddle to medium/medium-high heat. One by one, roll out balls of dough until very, very thin. Throw tortillas (one by one) onto the griddle. Cook on each side for 20 to 30 seconds, removing while tortillas are still soft but slightly brown in spots. Remove and stack tortillas, and cover with a towel to keep warm. Serve immediately or allow to cool before storing tortillas in a container. To warm, nuke tortillas in the microwave, or wrap in foil and warm in the oven.
Helpful tips:
* Make sure the water you pour in is very warm.
* Allow the dough to rest, both after kneading and after forming into balls.
* Roll out very thin.
* Get the heat right on your stove: Too hot, and the tortilla will burn in spots. Not hot enough, and the tortilla will begin to crisp before you can get it to brown. I get my stove between medium and medium high heat; that seems to do the trick.
* Use a dark griddle or cast iron skillet to brown the tortillas.
* Cook just long enough to lightly brown the tortilla in spots; don’t cook too long or tortillas will crisp. You want them to be soft and pliable when you serve them.
* Finally: Have fun! And enjoy them. They’re absolutely scrumptious.
My helper Gage!!!!!

Wednesday, March 28, 2012

Wonderful and yummy Drip Beef Subs!!

Hello everyone!  I have not posted in a while and am glad to be back posting.  I want to share with you a recipe that I made Monday night and it is amazing! I got this recipe out of the Pioneer Woman's new Cookbook it is called Drip Beef.  I made a few changes but I am telling you it makes your house smell so good.  Here it is.... make it asap! Enjoy!


Drip Beef
3-4 pounds chuck roast
 salt and pepper to taste
2 tbsp butter
2 cups beef broth
1 cup water
1 jar peperoncinis (located near the pickles)
10-12 buttered and toasted deli rolls
1 large onion
10- 12 slices of pepper jack cheese

In a hot skillet melt butter than place chuck roast in the skillet allowing it to sear on both sides.  Then place roast into warm crock pot.  Pour broth,water and the entire jar of peperoncinis juice and all in the crock pot.  Place lid on and turn to high for 6 hrs.  You can cook it for a little shorter if your chuck roast is smaller.  After 6 hours shred beef in pot or you can take the beef out and shred it but remember to return the beef to the pot.  When you are ready to eat slice onions and caramelize in a skillet.  When onions are ready so are you, assemble.  Bun, beef, onions, a few peperoncinis and a slice of pepper jack cheese. Then the MOST important part..... spoon some wonderful juice of the top of the meat,cheese,onions and peperoncinis and eat.

For my kids I left off the onions, cheese and peperoncinis.
For my husband I added more and more juice....
For me I just ate it and loved it.

Recipe adapted from the Pioneer Woman

Wednesday, March 14, 2012

Yummy...Ham and Cheese Brunch Squares

I had a request for more breakfast recipes, so here is another one I use often.  I love it. I make it sometimes for supper, I love to have breakfast for supper!!  I hope you enjoy!!!!


Ham and Cheese Brunch Squares
-----------------------------

Ingredients:
1 teaspoon vegetable oil

2 cups (8 ounces) grated Colby & Monterey Jack cheese blend, divided

1 package (22.5 ounces) frozen toaster hash brown patties, thawed (10 patties)

8 ounces cream cheese, softened

12 eggs

1/2 teaspoon coarsely ground black pepper

8 ounces thickly sliced deli ham

4-5 green onions with tops, divided (1 cup sliced) or you could use regular onion.

3 plum tomatoes (I did not use tomatoes)

Additional coarsely ground black pepper (optional)


Directions:
1. Preheat oven to 450°F. Lightly brush Large Bar Pan with oil using Basting Brush. Grate cheese  or use already shredded cheese. Crumble hash browns over bar pan; press gently into an even layer. Sprinkle half of the cheese evenly over hash browns. Bake 13-15 minutes or until crust starts to brown and cheese is melted.

2. Meanwhile, in bowl, whisk cream cheese until smooth using whisk. Gradually add eggs and black pepper; whisk until smooth. On Cutting Board, coarsely chop ham. Slice green onions, reserving 1/4 cup of the tops for garnish. Place ham and remaining green onions into (8-in.) Sauté Pan; cook and stir over medium heat 2-3 minutes or until hot. Stir ham mixture into egg mixture.

3. Remove bar pan from oven. Pour egg mixture over crust. Return bar pan to oven; bake 6-8 minutes or until center is set. Meanwhile, slice tomatoes in half lengthwise, scrape out seeds and dice. Remove bar pan from oven; top with remaining cheese, tomatoes and reserved green onions. Sprinkle with additional black pepper, if desired. Cut into squares and serve.

Yield: 12 servings

Nutrients per serving: Calories 250, Total Fat 19 g, Saturated Fat 10 g, Cholesterol 260 mg, Carbohydrate 4 g, Protein 16 g, Sodium 530 mg, Fiber 0 g

Cook's Tip: To soften cream cheese, microwave on HIGH 15-20 seconds or until softened. Whisk until smooth.

Monday, March 12, 2012

Purple Monster Smoothie

Ok this is a recipe my daughter loves and she has wrote this review.  My daughter found this recipe and made it and loved it.  My kids all love smoothies.  It is great for breakfast.  She altered the original recipe a little to make it better and here it is.  I hope you enjoy it as much as we all did!

Purple Monster Smoothie
Ingredients
  • 1 pint blueberries
  • 1 cup purple grapes
  • 8 strawberries,
  • 1 banana
  • One pot Greek yogurt
  • 1 cup milk
  • 2 tablespoons honey, or more to taste
  • 2 tbsp sugar
  • Ice
Directions
Put the blueberries, grapes, strawberries, banana, yogurt, milk, honey and ice into blender and blitz until smooth. Serve immediately.
Adapted recipe from The Pioneer Woman. www.thepioneerwoman.com

Cooking Sessions

Everyday Real Life Mom
Invites you
for a fun filled night of cooking!
We will be learning how to make several recipes with plenty of sampling. You will leave full and with several new recipes to try. 
Four Part Cooking
Sessions
Where: Markle United Methodist Church
When:
March 26 - Healthy Cooking
April 2 - Fast Weeknight Meals
April 9 -Budget Friendly Meals
April 16 - Slow Cooker Meals
All Cooking Sessions will start @ 6:30.
Must register by March 23rd.
The fee for each cooking session is $10.00 per person or $35.00 for all four cooking sessions.  Please register by calling Kelly Clanin @ 260-758-2116 or email at kclanin@frontier.com. Visit us online at everydayreallifemom.blogspot.com